As the core area of cooking activities at home, the kitchen countertop's aesthetics and functionality directly affect the user's quality of life. However, traditional manual cutting and polishing methods can no longer meet the precision requirements of modern home decoration.
Marble and granite CNC bridge saws, as advanced stone processing equipment, play an important role in the production of kitchen countertops. In this comprehensive guide, we'll explore the step-by-step procedure, safety precautions, and best practices to achieve high-quality countertops.
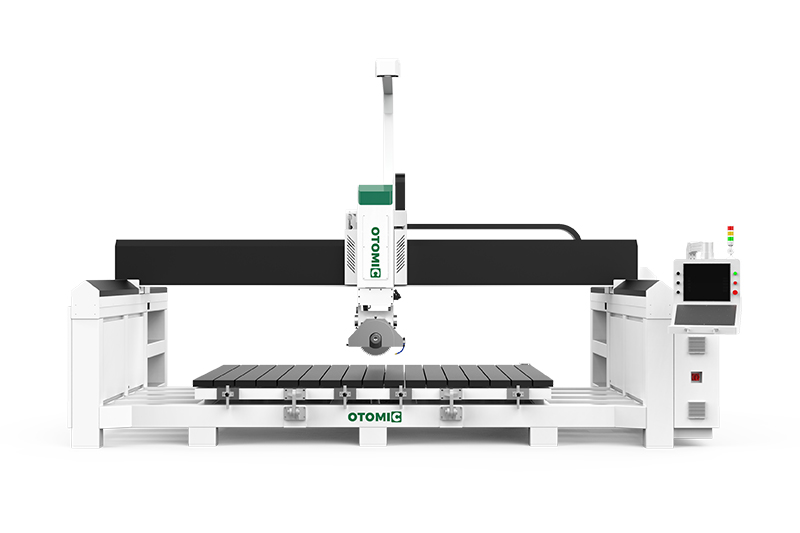
What Is the Marble and Granite CNC Bridge Saw?
CNC bridge cutting saw is a kind of mechanical equipment that uses computer numerical control technology to achieve precise cutting of hard materials such as stone and ceramic tiles. It usually consists of a CNC system, bridge, cutting head, workbench, and dust removal system.
These machines are equipped with a diamond-tipped blade and are controlled by a computer, allowing for highly accurate cuts, complex shapes, and intricate designs.
The Process of Making Kitchen Countertops with a Marble and Granite CNC Bridge Saw
Measurements and Design
First, the technician needs to accurately measure the actual space of the kitchen, including the height, width, and depth of the cabinets. Then, they need to use professional CAD/CAM software to draw detailed drawings of the countertop and mark the positions of sinks, stoves, and other overhangs. Be sure to:
1. Measure from the wall to the edge of the cabinets.
2. Take note of any special areas needing cutouts, such as sinks or cooktops.
3. Include a slight overhang (typically about 1 to 1.5 inches) when measuring, especially for materials like laminate and solid wood.
Create a rough sketch of your kitchen layout with detailed measurements to guide the installation process. If you're ordering custom countertops, these dimensions will be vital.
CAD Design: Use Computer-Aided Design (CAD) software to create a precise design of the countertop. This includes the dimensions, edge profiles, and any cutouts for sinks or appliances. Don't forget to run simulations to ensure the design is suitable and minimize waste.
Stone Material Selection
Choose the appropriate marble or granite slab based on the client's preference, the color scheme, and the desired finish. The slab should be inspected for any defects such as cracks, chips, or discoloration.
Marble: Known for its elegance and veining patterns, marble is softer than granite and requires careful handling to avoid damage.
Granite: A much harder material, granite is durable and resistant to scratches, making it ideal for kitchen countertops.
Setting Up the Marble and Granite CNC Bridge Saw
Machine Setup: Ensure that the marble and granite CNC bridge saw is installed on a stable and level surface. The saw must be properly aligned with the rails and the blade.
Calibration: Calibrate the machine according to the manufacturer's instructions. This includes setting the cutting parameters such as blade speed, depth of cut, and feed rate.
Loading the Slab
Slab Handling: Carefully load the marble or granite slab onto the marble and granite CNC bridge saw table. You can use suction cups or clamps to secure the slab and prevent any movement during cutting.
Positioning: Align the slab according to the design layout, ensuring that the saw blade will follow the intended path.
Start cutting
Rough Cutting: The process begins with rough cuts to separate the countertop pieces from the slab. These initial cuts help to manage the slab more effectively and reduce waste. Rough cuts also serve to prepare the material for more detailed work.
Precision Cutting: Programming the CNC: The CAD design is uploaded to the marble and granite CNC bridge saw's control system. The machine then follows the design to make precise cuts according to the programmed dimensions and shapes.
Edge Profiles: One of the key features of a countertop is its edge profile. The marble and granite CNC bridge saw can create a variety of edge profiles, such as bullnose, beveled, or ogee. These profiles are programmed into the CNC system and executed with precision.
Cutouts: The CNC machine also performs cutouts for sinks, faucets, and other appliances. These cutouts require high precision, especially when dealing with complex shapes or curves, to ensure that the sink or appliance fits perfectly within the countertop.
Monitoring the Cutting Process
Continuous Monitoring: Operators must continuously monitor the cutting process to ensure that everything proceeds as planned. Any irregularities, such as unexpected vibrations or deviations from the programmed path, should be addressed immediately to prevent costly mistakes.
Cooling System: Most marble and granite CNC bridge saws are equipped with a water cooling system to prevent the blade and material from overheating. Proper cooling is essential to maintain the integrity of both the blade and the stone material.
Inspection and Quality Control
Checking for Accuracy: After cutting, the countertop pieces are inspected for accuracy. This involves verifying the dimensions, checking the edge profiles, and ensuring that the surface finish meets the required standards.
Identifying Defects: Any defects such as chips, cracks, or uneven surfaces are identified. While minor defects can often be corrected through polishing, major issues might necessitate re-cutting.
Polishing the Countertop
Polishing Process: Polishing is a multi-step process that uses diamond polishing pads of varying grits. The process starts with a coarse grit to remove any saw marks and proceeds to finer grits to achieve a smooth, shiny finish.
Edge Polishing: Special attention is given to polishing the edges of the countertop, as these are highly visible and contribute significantly to the overall aesthetic of the finished product.
Sealing the Stone
Applying Sealant: A sealant is applied to the polished countertop to protect the stone from stains and moisture. This is especially important for kitchen countertops, which are exposed to a variety of substances that could damage the stone if left unsealed. After applying the sealant, the countertop must be left to cure for the recommended time to ensure that the sealant fully penetrates the stone and forms an effective barrier.
How to Install Kitchen Countertops?
Preparation for Installation
Preparing the Kitchen Area: Before installation, ensure that the kitchen cabinets or supports are level and sturdy. The surface where the countertop will be installed must be clean and free of debris.
Dry Fitting: A dry fit may be conducted to ensure that the countertop pieces align perfectly with the kitchen layout. This step helps to identify any last-minute adjustments that may be needed.
Align the countertop with the cabinets and check for gaps between the wall and the countertop. Walls are often not perfectly straight, so you may need to scribe the back edge of the countertop to fit snugly against the wall.
Fitting and Securing the Countertop
Positioning the Countertop: The countertop pieces are carefully positioned on the prepared surface. Special care is taken to ensure that the pieces align correctly and that any seams are tight and level. Place a level on top of the countertop to ensure it’s sitting evenly. If the cabinets or floor are not level, you can use shims to adjust the countertop and make sure it sits properly.
Securing the Countertop: Once in place, the countertop is secured using adhesive. Stone countertops require color-matched construction adhesive, ensuring a seamless appearance. Apply a generous bead of adhesive along the top edge of the cabinets, and then place the countertop onto the adhesive. Use clamps to hold it in place while the adhesive cures, usually for 24 hours. Check for levelness again during this step and adjust with shims if needed.
Final Adjustments: Any final adjustments to the alignment or fit are made before the adhesive sets. It’s crucial that all edges are flush with the cabinets and that there are no gaps.
Installation of Sink and Appliances
Sink Installation: Apply a bead of silicone around the sink cutout, and then drop the sink into place. Secure the sink by tightening the clips underneath. Reconnect the plumbing, ensuring all connections are secure to prevent leaks.
Appliance Cutouts: If any additional cutouts were made for appliances, these are checked for accuracy and fitted as needed.
Final Inspection
Quality Check: A final inspection is conducted to ensure that the countertop meets all design specifications and quality standards. This includes checking the finish, edge profiles, and the integrity of the seams. And don't forget to make sure all electrical and plumbing connections are working properly after reinstalling appliances and fixtures.
10 Essential Tips for Success
1. Measure Twice, Cut Once: Before making any cuts, always double-check your measurements to avoid costly mistakes. Small miscalculations can lead to gaps, uneven surfaces, or improper fitting.
2. Use the Right Tools for the Material: Different countertop materials require different tools. For example, use a diamond-tipped saw blade for cutting stone countertops and a fine-tooth blade for cutting laminate. This ensures clean and accurate cuts.
3. Consider Professional Help for Heavy Countertops: Materials like granite, quartz, and marble are extremely heavy and difficult to maneuver. In these cases, hiring a professional for installation can help avoid injuries or accidents.
3. Check for Leveling at Every Stage: Uneven cabinets or floors can cause the countertop to sit improperly. Use a level frequently during installation and adjust with shims as needed to ensure the surface is perfectly flat.
4. Use Clamps for a Secure Fit: When gluing stone countertops in place, clamps will help hold the countertop securely while the adhesive sets, ensuring a tight and even fit.
5. Prepare the Area Before Installation: Clear the area of any debris or remnants from the old countertop. A clean, even surface makes for an easier installation and a better result.
6. Seal Stone Countertops Properly: Stone countertops like granite or marble need to be sealed to protect them from moisture and stains. Apply the sealer according to the manufacturer’s instructions after installation.
7. Account for Overhang: Ensure your countertop overhangs the edge of the cabinets by at least 1 inch. This provides a polished look and prevents water from running directly onto the cabinet faces.
8. Secure Fixtures Tightly but Gently: When fastening the countertop, especially laminate or wood, avoid overtightening screws, as this can crack or damage the material.
9. Test Plumbing and Electrical Connections: After reinstalling sinks or appliances, check all plumbing and electrical connections for leaks or faults to ensure everything works correctly before finalizing the installation.
Conclusion
Using a marble and granite for making kitchen countertops combines precision engineering with the natural beauty of stone. By following the detailed steps outlined in this guide, you can produce high-quality countertops that meet the demands of modern kitchens. Attention to detail, proper machine operation, and careful handling of materials are key to achieving the best results.
Investing in good quality equipment and continuous learning will help you stay ahead in the competitive market of countertop fabrication, ensuring that your work is not only functional but also a piece of art that adds value to any home. As a professional CNC machine manufacturer, we can produce the most professional marble and granite CNC bridge saw for making kitchen countertops.
Please contact us for the latest and greatest kitchen countertops solutions: manager@elephant-cnc.com.