Steps to Build A Cabinet With A Cabinet Production Line
Author: Jack; Last Modify: Apr 27, 2021
How to build a cabinet with high quality and efficiency has always been what the cabinet makers are chasing for. Today's market requires cabinet makers to use automated equipment and technology to gain a competitive advantage. And also meet the custom cabinet making requirements of customers. The advent of CNC machinery has provided the tools, support and resources that exceed manual machines to build a cabinet. It has made cabinet making much more efficient.
Cabinet making usually falls into two processes: build cabinets and make cabinet doors. I have introduced the steps to make cabinet doors in an earlier article. So this one is going to tell you the steps to build a cabinet. Similar to the article on cabinet door making, the following text also introduces a production line to build a cabinet. This line has less number of machines and is easy to operate. So it's quite suitable for cabinet making for beginners.
Recommended production line to build a cabinet
Using CNC machines to build cabinets can effectively control costs and improve machining efficiency. So I recommend using a cabinet production line to build a cabinet. This production line, with simple operation but multiple functions, is dedicated to the production of cabinet body. It consists of three machining units, namely nesting unit, edge banding unit and drilling unit. This production line applies to the machining of kitchen cabinets, wardrobes, cupboards, shelves and other cabinet bodies.
Nesting unit mainly includes a four-process nesting CNC machine. It can complete the cutting, grooving and drilling processes in the course to build a cabinet.
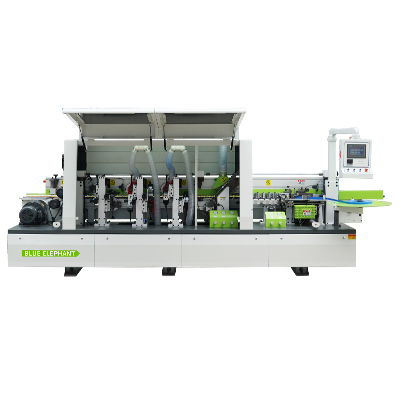
Edge banding unit consists of an automatic edge banding machine and a folding arm curved edge banding machine. This unit is used to band straight and curved edges in the process to build a cabinet.
Drilling unit mainly include a CNC side drilling machine for drilling side holes on panels.
The following video shows the workflow of this production line to build cabinets.
I'll give a detailed description of how to build a cabinet using this production line.
Step 1 to build a cabinet: design
The first step to build a cabinet is to turn your cabinet plans into a file. Your cabinet plans include the style and the detailed dimension of the cabinet. Good cabinet designs can not only take full advantage of the space, but also decorate the room.
This step is realized by the CNC router software or nesting software. You can use CAD software to make a drawing and import this drawing into a CAM software. The CAM software then generates a G-code that the nesting CNC machine can understand. After the controller of the nesting CNC machine receives the G-code, it will start the motor to drive the nesting CNC router to work along the scheduled path.
Besides, you may also need to choose the material to build a cabinet. For example, MDF, particle board, plywood, melamine, flakeboard and other wood materials. The recent trend is to adopt solid surface, recycled and greener materials.
Step 2 to build a cabinet: cut, groove and drill vertical holes
After designing the cabinet style, you can proceed to the next step to build a cabinet: cut, groove, and drill vertical holes.
Cutting stands for cutting the entire large board into small pieces. The most commonly used boards include flakeboard, density board, or plywood. There is a standard for the size of such large boards used to build a cabinet, which is generally 2440*1220mm or 2800*1300mm.
Some panels need to go through the grooving process. The panels usually require this process include the bottom panels and side panels. Because almost all the current manufacturing processes to build cabinets are to clamp the back panel with the side panels and the bottom panels. So the side and bottom panel need to be grooved on corresponding position. This makes it convenient to insert the back panel into the side panels and fix on the bottom panels.
The cabinet built this time adopt three in one furniture connectors to assemble. So it also needs to drill relevant holes on some panels. The nesting CNC router here can only drill vertical holes.
CNC Machine used in this step
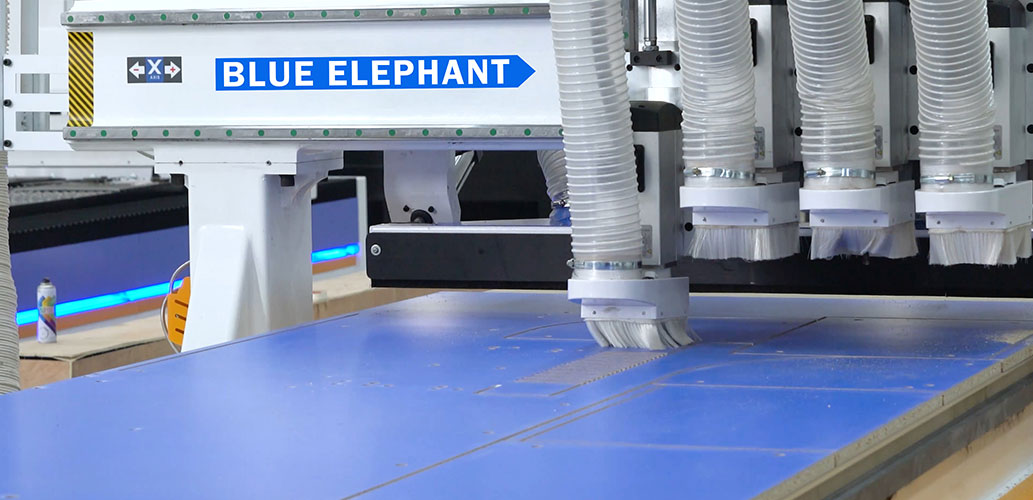
This step to build a cabinet door relates to the above nesting unit of the production line. The machine used here is 1325 four-process nesting CNC router.
The effective working size of this four-process nesting machine is 1300*2500mm. It is suitable for processing the board of 2440*1200mm. With high automation level, this nesting CNC machine is easy to learn and operate. Failure rate of this CNC router is low. Malfunction of one spindle does not influence the use of other spindles. This CNC machine is very suitable for DIY cabinets or build your own cabinets.
Concrete steps to use the nesting CNC router to build a cabinet
#1: Load a board. Load the selected board to the worktable of this 1325 nesting CNC router. It has four rows of rollers to assistant the loading. The vacuum table can fix the board firmly to avoid any movement.
#2: Start the machine. If you have completed your cabinet design and set the tool path, you just need to watch the working conditions. The CNC router machine will automatically conduct the cutting, grooving and drilling processes.
#3: Label and unload the board. Label the bar code on corresponding panels. Then you can unload the panels from the machine for the subsequent edge banding process. Precision matters in this step to build a cabinet. If the accuracy of cutting, grooving or drilling is poor, it may be impossible to assemble this cabinet. Using the four-process CNC nesting machine can ensure the accuracy of cabinet making and the consistency of processing procedures, and avoid large errors. In addition, compared with other ATC CNC router or machining center, the four-process nesting CNC router price is relatively low. It is an excellent choice for small and medium size panel furniture factories.
Step 3 to build a cabinet: band edges
The following step to build your own cabinets is to band relevant edges. Except for back panels, all most all other panels need to band edges. So this step is an important process in cabinet making.
The quality of edge banding directly affects the quality, price and grade of the cabinet. The edge banding process can appropriately improve the appearance of the cabinet. Besides, banded edges can effectively avoid damaging the corners during transportation and use, and peeling off the veneer of the cabinet. At the same time, it can play a role in waterproofing, reducing the release of harmful gases and reducing deformation.
CNC Machines used in this step
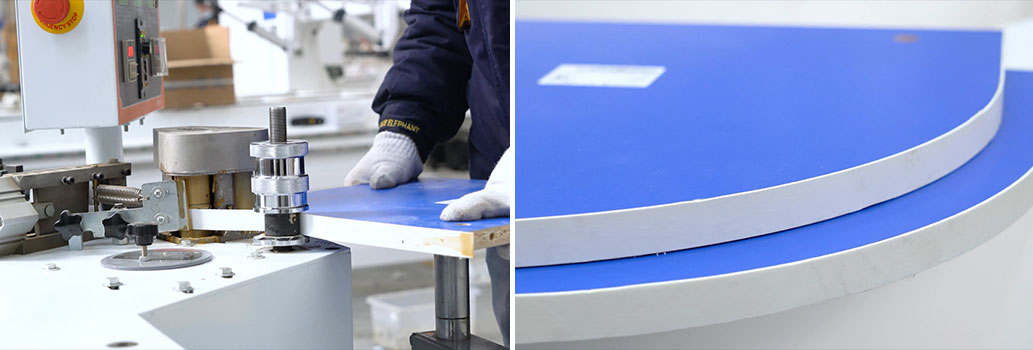
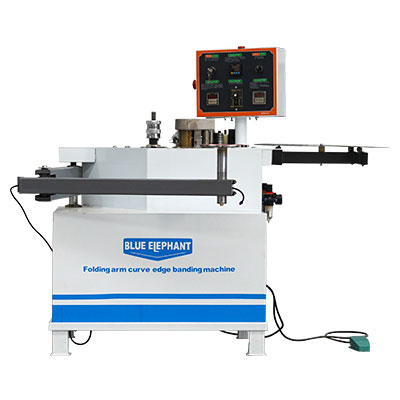
This step to build a cabinet involves the edge banding unit. The CNC machines used here are the automatic edge banding machine and the folding arm curved edge banding machine. The former is suitable for banding straight edges automatically. The latter is for banding curved edges in a semi-automatic way.
Except for straight edges, there may be curved edges that also need banding in your custom cabinet making. This requires the folding arm curved edge banding machine.
The banding materials can have PVC, melamine, wood veneer, etc. The banding work of all regular and irregular edges in your DIY cabinets process can be finished rapidly with these two machines.
Concrete steps to use the edge banding machines to build a cabinet
Thanks to its automatic operation, the use of the automatic edge banding machine to build a cabinet is simple.
#1: Select the edge band with appropriate thickness and color based on your production needs. Then put the edge band on the rotary table at the starting position. Pull the end of the edge band into the gluing and pressing device.
#2: Set the parameters via the touch screen control panel. For example, panel thickness, band thickness, speed etc.
#3: Place the panel on the conveyor close to the gluing and banding device. The panel will go forward for subsequent treatment automatically.
#4: Fetch the panel at the end of the edge banding machine.
#5: Repeat the above step #3 and #4 to band all the edges that need banding.
For banding curved edges, you need to manually operate the panel to complete this process:
#1: Select the edge band with appropriate thickness and color. Make it ready for banding.
#2: Put the penal on the worktable, adjust the folding arm, and step on the pedal switch.
#3: Make the edge of the panel close to the pressure roller and the edge band. Move the panel slowly with the band to the left at the same time. Ensure that the edge band is firmly glued to the curved edge.
#4: Repeat the above step #2 and #3 to band all curved edges. Since this machine does not have automatic trimming and scraping functions, so the panel may require subsequent manual trimming and polishing.
Step 4 to build a cabinet: drill side holes
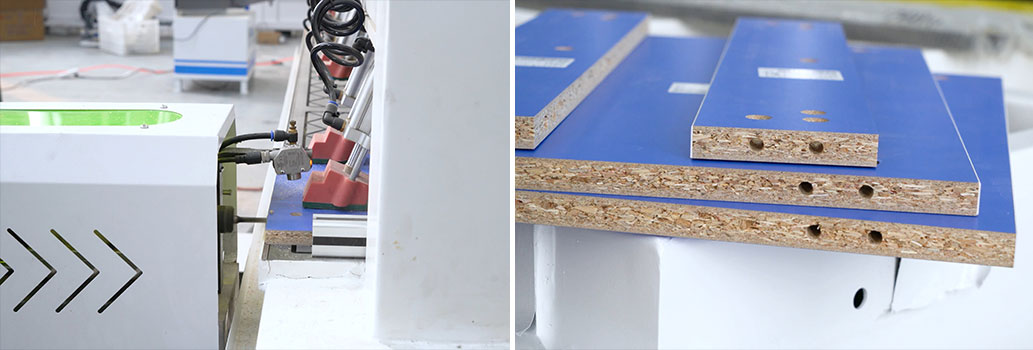
The aim of this step to build a cabinet is to drill holes on the side of panels for assembly purpose. This is an important step to build cabinets and has high precision on drilling position. Any error in the drilling position could result in the impossibility to assemble the cabinet.
You can use electric drill to drill holes manually. But it’s slow and with poor precision. However, the CNC wood drilling machine can perfectly solve this problem.
The cabinet showed in the video adopts three in one connectors to assemble. So in this step to build a cabinet, we drill holes on side of the panel to install the bolts and wood plugs.
Concrete steps to use the side drilling machine to build a cabinet
The side wood drilling machine is easy to operate and can start the side hole drilling process through scanning the bar code. Besides, there is no need to adjust the ruler repeatedly, which greatly improves the drilling efficiency.
Concrete steps to drill side holes include:
#1: Turn on the power supply of the wood drilling machine.
#2: Put the panel on the worktable at an appropriate position. Adjust the position of the fixtures for securing the panel.
#3: Scan the bar code labeled on the panel with the scanning gun. The side drilling machine starts to drill after it receives the drilling demands.
#4: Release the fixture and take down the panel. You can put several panels on the worktable for drilling at the same time. This could save you a lot of time. The side drilling machine is cost-effective and is a good choice to DIY cabinets or build your own cabinets.
Step 5 to build a cabinet: assemble
Here comes the last step to build a cabinet. Assembly of the cabinet uses the three in one connectors. These are the most commonly used connectors in panel or custom cabinet making. A three in one connector consists of three parts, i.e. eccentric wheel, bolt and nut.
The three in one connectors have many advantages. For example, the furniture assembled with three in one connectors can be assembled and disassembled for multiple times. Using of such connectors definitely reduces the use of adhesives, which is more environmentally friendly. For assembling the cabinet, you need to insert the back panel into the grooves of the side panels and fix it on the groove of the bottom panel. And then you need to install the three in one connectors successively.
So far, you have finished all the steps to build a cabinet. You, now, get a simple but practical cabinet. If you want to build a cabinet with more partitions or more styles, you need to make a more detailed or creative design in the first step. In case that you also need cabinet doors, you can refer to the article of making cabinet doors to make cabinet doors matching with your cabinet.
Conclusion
This production line to build cabinets has only four CNC machines. The operation is simple. But it can meet most of the cabinet machining requirements. Because different from the various styles of cabinet doors, the processing of the cabinet body is simpler.
Blue Elephant has helped thousands of cabinet makers and carpenters to transit from traditional saws and manual tools to automatic production lines. The cabinet makers have successfully made full use of the enormous advantage of CNC manufacturing. Using the automatic production line to build a cabinet can significantly increase the production efficiency, save labor and time and reduce material waste.
Cabinet making factories can take advantage of this production line to build cabinets. It can not only increase the efficiency and output, but also improve the competitiveness. In case of tight budget, you can also buy one CNC machine in this production line. This can also improve your cabinet making efficiency.